Showing posts with label Creativity. Show all posts

25 May 2012

Grow-Up Together Dresses: Year 3


I think they have maybe another 2 months before the Grow-Up Together Dress moves from a mini-dress to a tunic.

We all still love them, but they're a wee bit tight going over the arms.  I can't tell if that's because of the thick stiff linen I used or just the width.

Here's hoping there's a year four!

14 April 2012

Easter Dresses


Little Easter wrap dresses. Love these.  And love that I only have to move the snaps to get them to last 2-4 years.  :)

This is the perfect dress for an advancing beginner.  A patient beginner might be able to tackle this.  The hardest part is turning the straps after they've been sewn. 
The fabric is Anthology High Society by Khristian A. Howell. Dress pattern found below.

08 April 2012

Fly Away Blouse

Somehow one day I stumbled on the Fly Away Blouse from Anthropologie.


I thought it was lovely.... and expensive.  Then I thought: I could make that!

I grabbed Collette patterns Free Sorbetto pattern and I got to work with a lovely piece of Radiance Silk/Cotton blend.

But try as I might... I could not get this silk cotton to pleat like that!  It just didn't want to do it; the fabric didn't drape right and stuck out in weird places.  So after an hour of trying my hardest, I just slapped an inverted pleat on there and finished it!

Ta-da!


I think it'll look a little sharper (and fit across the bust better) when I wean the boy... but I love how soft and airy it is and the fit of this pattern is lovely!

I added a 5 strand flat braid to the neckline.

Then rather than seaming up the braid I made a little loop in the back and covered it with bias tape.

I love it! I think I'd like to make a dozen more.

And for those of you seamstresses who stop by here and are much better than me:  Did I need to make a full bust adjustment or add length before the darts? I have an extremely low bustline b/c my torso is over half my height.   I added 3.5 inches to the length of the top to get it to hit at the hips, but I added at the hem.

08 November 2011

A Hat for Sedryn

This boy has a big head (just like his daddy... ahem :-p)!

He couldn't wear the newborn hats in the hospital.
I have exactly 3 hats that sort of fit him.
So when we ran out to Target with a gift card to spend, I looked to get him a hat.

Apparently hats at Target only come in two sizes: Newborn and 12-18 months.

Disappointing, but crafting inspiring.

Meet Sedryn's new hat made from Daddy's old shirt (with enough to make a few more) and a bit of ribbing.   I used this free pattern from Sew Liberated.
Perfection.


And, oh my goodness!  Is this boy getting chubby or what?!  I might actually have a baby with rolls since the girls never did chunk out!

08 October 2011

Little One's Nursery

Little One's Nursery is finally finished!  Except for a broken drawer slide that we're getting fixed. :(  But since Little One could come any day now, I thought I'd go ahead and blog about the space.  My original design board can be seen here and I'm super excited about how that little design board poured creativity into this space :)


I'm very proud of the handmade love in this room and would love to tell you about each little element in detail.  But if you're not so detail oriented you can just skip reading the following section and enjoy the photos.  It won't hurt my feelings :)

Curtains

I ended up choosing Premier Prints ZigZag in Village Blue for the curtain fabric. It did seem a little more gender neutral than my other option and I really love the zigzag effect.  I'm actually wishing the window in my bedroom was the same size so I could inherit them when Little One upgrades to a big kid room.

The curtains are unlined with tab tops. Basically it's just a simple rectangle with hems: totally my type of mindless sewing project :)

One of our favorite little touches was finding this nifty bird curtain rod at one of the local home improvement stores (Lowes, I think?).  I'm pretty sure that all bedrooms will have this rod before we're finished decorating.

Wingback Chair and Accessories

Our neighbor gave us this wingback chair when they bought new furniture.  There was nothing wrong with the piece structurally and it's actually a decent solid color blue with some fading.  But we had no place where it truly fit in, and I wasn't a fan of the formal look that wingback chairs have.

And then one day I stumbled onto this video tutorial series on Slipcovering a Wingback chair from Miss Mustard Seed.  Perfect!  I was super intimidated by the whole process of slipcovering and I have been for years.  My furniture is all mis-mosh side of the road finds and I've wanted to make it match, but the price of slipcovers and the scariness of messing up all that expensive fabric scared me!  But for this chair, I thought that giving it a try with about $25 worth of drop cloth was totally worth it.

To say I'm actually surprised by how easy this was is an understatement.  It was a pretty intense project with scraps and bits and pins and piping everywhere, but it wasn't hard.  And even though it's nowhere near perfect, I'm totally ready to jump into slipcovering my other furniture.... once life settles down a bit. ;)

Pillows

I wanted some pillows to go with the chair both to use my favorite accent fabric, Premier Prints Hooty Owl Village Blue,  and also to be able to give some support to my lower back while nursing.  Both square pillow forms were given to us with a couch from the same generous neighbor as the wing back chair. They're simple envelop style covers with leftover piping from the wingback chair.

The roll pillow is actually a rectangle form that I stuffed into a round pillow. I made that pillow by cutting a rectangle from the leftover zigzag fabric, sewing it into a cylinder while leaving a hole for stuffing in the form, and then gathering both ends.  It's not exactly what I envisioned, but I does provide ample lower back support!


Lamp 
 
I hate turning on the big light to nurse, so we got this little lamp.  I simply painted it Sherwin Williams Morning Fog and ModPodged some cut out owls on it.  The side table is actually a patio table that we've had for years.  Simple, and serves it's purpose :)


Dresser and Accessories
Oh, we wanted to build a dresser so badly for this room!  We wanted to give the baby a little heirloom piece to pass down.  But when we crunched numbers and found out that lumber alone would cost about $100 and we'd still need a few tools, paint, and stain... sight.  We ended up getting this dresser off Craigslist.  (Just a side note: dresser shopping on Craigslist when your budget is $50 or under is so frustrating!  No one gets back to you if they've already sold the dresser.)

This dresser actually wasn't terribly bad to begin with.  It had lots of dings and scratches (character), but was of a uniform color, had all of it's knobs, and had good bones. I especially liked the little etching on the front.  It looks like tree leaves to me.  The only real problem was one beat up drawer slide that we're getting replaced: hence, the currently missing drawer ;)  Not bad for $40!

We took her outside and stripped the top of stain. Derek and I actually really enjoyed that process.  It was smelly... but we had a blast destroying something to make it better.  After stripping, we primed and painted the bottom and drawer fronts.  The final color is Sherwin Williams Morning Fog.  It's a really great neutral gray.  Then, I stained and polyurethane-ed the top with an Antique Walnut Stain (I got it at walmart... too lazy to go look at it for the name brand).  Finally, I took a little brush and with some blue acrylic mixed with Morning Fog, I highlighted the fun etching. 

Changing Pad Cover

When I saw this fabric, I knew it belonged in this room!  It's Wrenly Mama Birds by Valorie Wells, and it had a Mama bird with three little babies in parts.  This is actually the only piece leftover from the quilt backing and it was the perfect size to cover this little changing pad.  I just rounded the rectangle, sewed a casing along the edges, and threaded through some elastic.  Easy :)

Fabric Basket

I absolutely love the fabric basket in the girls room.  It was purchased, but it's the perfect thing to hold wipes and creams.  I still had owl and zigzag scraps left, so I gave I decided to make one.  I loosely followed this tutorial and love how it came out!  It's a little floppy, but it'll serve it's purpose and, unlike the girl's basket, it's completely washable when that inevitable 'accident' happens!

Owl Bird Art

Sadly, the lovely Owl and Birch Tree vinyl art was waaaaay outside of our budget.  We couldn't make it work.  So I had to get creative with making wall art.  The Owls and zigzags here are simply adhered to scrap plywood cut to size by my sweet husband.  A few picture frame hangers later and we had some art!


Owl Book
 
My sweet friend Mandy made this with my final owl fabric scraps.  It's filled with notes and prayers from the ladies who attended my shower for Little One.  It's it such a sweet idea?!


Owl Print

Mandy also commissioned a friend to make this adorable Owl print for the nursery.  All those finger print leaves belong to people who love and are praying for Little One.  Can you tell Mandy totally spoiled me and Little One at the shower?!


Crib and Accessories
Like I mentioned in my design post, we have a borrowed Ikea Crib.  It seems a little longer than American cribs and the mattress is definitely longer.  If you get one of these, beware!, jersey sheets are the the only thing that will fit!  If it weren't a borrowed crib... I probably would have painted it a fun color... ;)


Little Owl

Another friend at the shower, Heather, made this little guy!  Isn't he adorable? The girls are in love with him!


Quilt

 I initially thought I'd use the Hooty Owls, but since it's home decorator fabric, it's a little rough for a quilt.  After I stumbled on Valorie Wells' Wrenly line, I knew that I needed to use that for my quilt! I grabbed a fat quarter set of cobalt, and a couple yards of Mama Birds for the backing and got to work.

I used a pretty simple pattern from Sew4Home, and I pretty much copied their quilting lines.  This quilt top came together in about 3 hours and I think the whole quilt only took about 6-7 with binding (as usual) being the hardest part.  I pieced all my leftovers from the fat quarters onto the back to add a little interest. :)

Tiny Rocker

This was another amazing gift from my neighbors.  It's so adorable.

Bird Mobile

I had some small scraps left from the fat quarters and I was set on making this bird mobile.  I had wanted to do it for the girls. Although the vinyl art was not in our budget, a package of stuffing and a couple packages of hooks were totally in the budget.  I didn't have anything to lose except $10.  So I went for it.  And I love it.  Hearing the girls shriek, "Burd! Burd!" makes it totally worth it!


Outlet Covers

Once we painted the room in Sherwin Williams Lemon Meringue, it became very apparent that the black plastic outlet covers were not going to match very well.  Since we'd already spent a lot of money on this room, I was feeling too cheap to buy new covers. I started by attempting to paint them... but the paint just peeled right off... So I researched on the web a little and learned I could ModPodge fabric onto them.  Brilliant!  They may be one of my favorite accidental details in the whole room :)


05 August 2011

The Great Kitchen Remodel: Stage 1

My kitchen was a cave.


Dark cabinets, super old fake wood laminate counter tops, dark dental molding all the way around the room, and dirty flat painted beige walls were sucking out the light from the 4 windows in the huge room.  Here's proof:


Additionally, there was this little desk in the corner that really served me no purpose.  And the final straw was that no drawer in the whole kitchen was wide enough for a silverware sorter except for one of those desk drawers.


After we ripped out the wallpaper in the master, prepared the girl's nursery, and spontaneously redid the guest bathroom, I set my sights on the kitchen.  Our budget was (is) tiny so I knew we'd have to do work in stages.  For Stage 1, I wanted the most visual change for the least amount of money (especially since midway through this process we found out about our Surprise Baby!).


Can you believe that most of this change is paint?!  I hardly recognize the space when I pulled out the before pictures!

Breakdown of costs:


Removal and Replacement of Desk: Free!
Derek pulled out the desk saving the fake wood counter-top.  My father-in-law built the new cabinet using scrap wood and materials. The two of them attached a piece of wood to the back of the old counter top to make it as long as the rest of the counter tops and replaced it ontop of the new cabinet.  Obviously it still needs doors... but right now everything down there is for the girls to play with :)

Primer, paint, glaze small rollers for the cabinets: approximately $60.
We used a gift card for the primer/supplies and only had to pay for the paint and glaze.  All work was done ourselves.


Whimsical fork, knife, and spoon pulls for the cabinet doors: Free!
They were a Christmas Gift from my parents!


New hinges for the Cabinet Doors to match pulls: approximately $15.
It would have cost more, but a couple sets of the hinges came with the pulls at Christmas :)

Paint for the walls: approximately $30.
That dirty beige flat paint sucked up paint like a sponge so we actually needed two cans.  However, I bartered sewing skills for the second can of paint (thanks, Jessica!) and we ended up having enough in the second can to also paint my entryway. Bonus! :)

Stencil, brush, and acrylic paint for the back splash: approximately $35.
The stencil (found here) cost about $29 with a coupon code from an ad on The Nester's blog.  The brush and cheap acrylics made up for the rest of the price.


Cute bird containers: Free!
The containers are actually entertaining cookie tins that we've had since we got married and used for the same purpose of holding spoons and such. I had Mod Podge leftover from the girl's bird art and the fabric is from the remnants of a dress I just finished.  I have some more of this bird fabric and I'm debating between putting some on the bottom of kitchen towels or making hot pads.  I may have enough for both...

Total Cost: $140

Stage 2 Plans include:
  • New Curtains
  • Doors for the Cabinet
  • Replacing the Crown Molding we tore out in the whole room (should it be cabinet color... or white?)
  • A Sturdy Shelf for the Microwave between the cabinets and wall (a built-in won't fit above the stove)
  • A Storage Bench for kiddos to sit on at the dinner table
  • And I'm trying to talk Derek into letting me paint and stencil the linoleum since redoing the flooring is last on our to-do list.  I don't think I'm succeeding... but I can keep trying. ;)
  • Oh, and eventually all our appliances will be black... we just don't replace until they die.  Though getting a new stove hood is pretty tempting... especially knowing how cheap they are.
And just a little recap:

02 August 2011

Maternity/Nursing Dress Tutorial


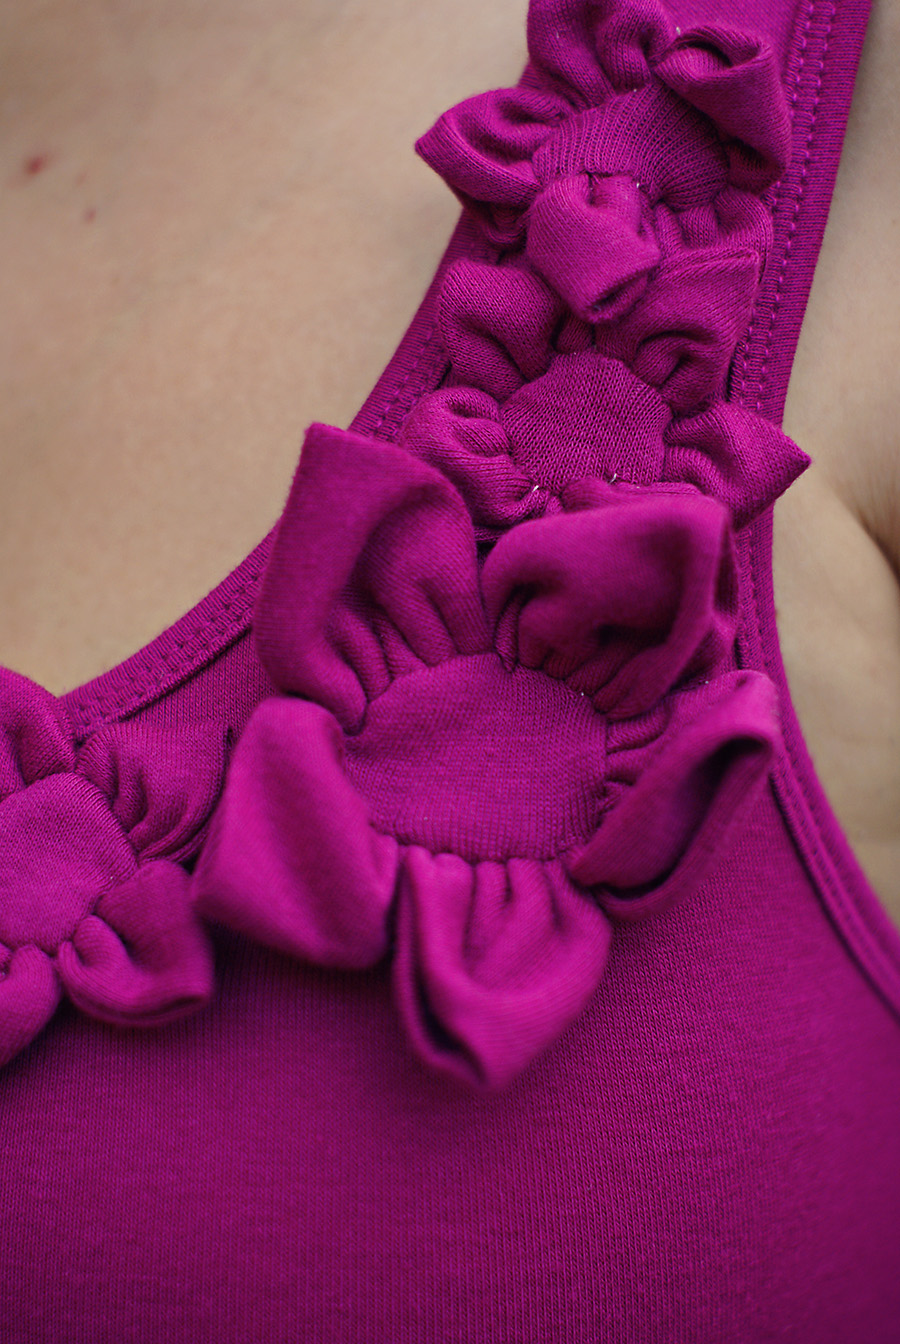
So I totally took step by step pictures of the entire process of making this nursing dress when I made the fabric flower tutorial.... but it appears that I somehow deleted each and every one of them before getting Derek to take pictures of the dress on me.  Sigh.  So you'll have deal with very non-visual instructions on making yourself this dress.  :(

1. Try on a tank and mark about 1" below  a good empire waistline for you. Cut the bottom of tank off. (in retrospect I might have cut it so that the back was shorter than the front since you can see how it's longer in the back)

2. Cut a 4" strip from the top of the remaining bottom half of the tank.  Fold in half.  With right sides together pin and sew to the bottom of your Empire waist-ed tank top.

3. Measure around the fullest part of your hips if you're making this for nursing or the fullest part of your tummy if you're expecting (or if your hips are wider than your tummy measure that).  Add 6-12" of ease (less if you're nursing, more if you're expecting and making this near the beginning of your pregnancy).  Divide the measurement in half and add one inch.

So the formula looks like this  Hip/tummy measurement + 6-12" / 2 + 1" = X or the width of the front and back skirt panels.

4. Now measure from the seam you made on your tank to the length you'd like the skirt to be.  Add 2.5" for the seam and hem allowances.

Formula for length: Desired length + 2.5 = Y or length of skirt panel.

5. Cut 2 skirt panels X by Y.  If you do full length like I did, you may want to taper the skirt out in a trapazoid fashion so that it's about 3-6" wider at the bottom than the top.  I can't take too long of a stride in this dress because I didn't do that.

6. Sew skirt front and backs together at the side seams.

7. Make a tiny hem at the top of your skirt piece.

8. Hand wind a bobbin with elastic thread. Sew two lines of stitching around the top of the dress with the elastic thread in the bobbin and high tension on the top thread.  (if you're making the dress nursing friendly, you may want to sew a couple extra lines of elastic in the front panel: especially if you're pregnant when you make the dress).

9. Pin the skirt to bodice seam right sides together with the waistband itself turned up and out of the way.  (this is the hardest step without a picture.  Basically, the skirt will be inside the front of the dress with the waistband turned out of the way.  Your waistband will be sandwiched between the skirt and tank.  I'm probably over explaining...)

Leave most of the skirt gathers at the front and back of the dress leaving the sides straight.  If you want the dress to be nursing friendly, do NOT pin the front of the skirt to the bodice.  The elastic thread should hold it up.  If you're not concerned about nursing access then go ahead and pin the front down.

10. Try on the dress and adjust as necessary.  Mark your hem placement and then turn up and sew your hem.

11. Embellish as desired.  Enjoy your dress!